Category: Garden Design

  • The Perennial Garden

    The Perennial Garden

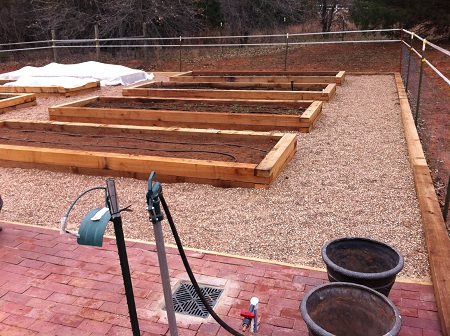
    After a few years a perennial garden begins to pay off. Many plants take some time to establish roots. After considerable maintenance and very little production, our little perennial section has become a bounty.

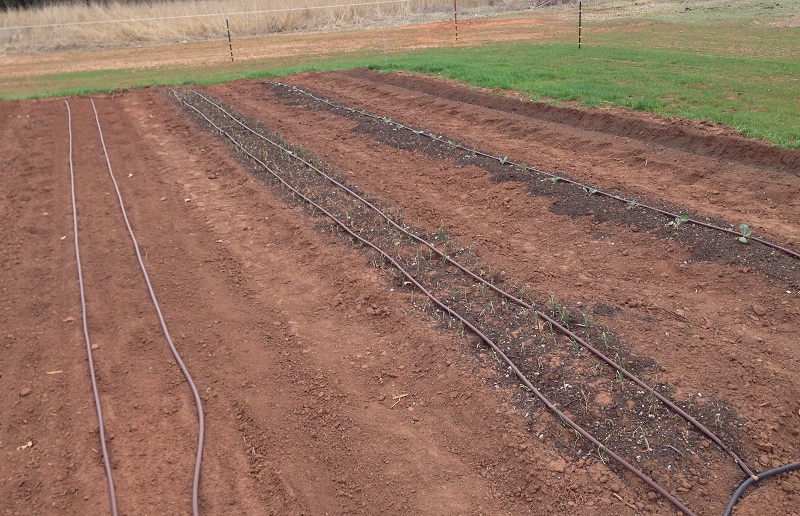
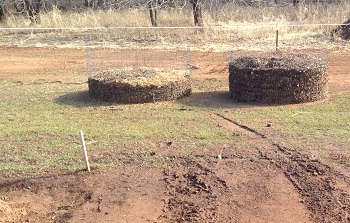
    Most of the work involves weeding throughout the year. Blackberries and Asparagus cannot be tilled. Blackberries will send up shoots where ever a root is cut. They want to ramble. So the way to minimize their spreading is to mulch heavily and hand weed. We have used cotton seed hulls, stump grinding residue and grass clippings in this area. It is paying off. Weeds are easily pulled from the deep mulch.

    may asparagusOur asparagus is maturing into the rich compost filled trenches where is was planted almost 3 years ago. The shoots are still emerging from where the crowns were planted. I am hopping that they will spread between the double row of plants. We are harvesting 1 – 3 pounds every other day of prime thick and tender shoots.


    A friend of mine, Stefan Conrady, who is German, says that in Germany they produce white Asparagus. I image they mulch the crop with 1 foot of hay or some thin mulch. This would blanch the shoots and keep them from turning green. I may try this if we can conjure up some straw next year.


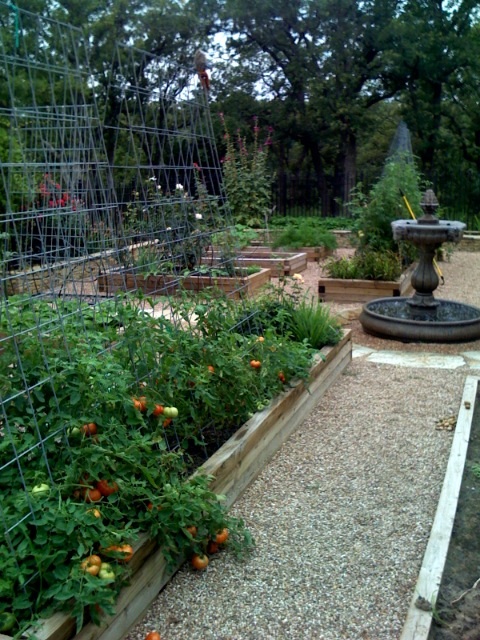
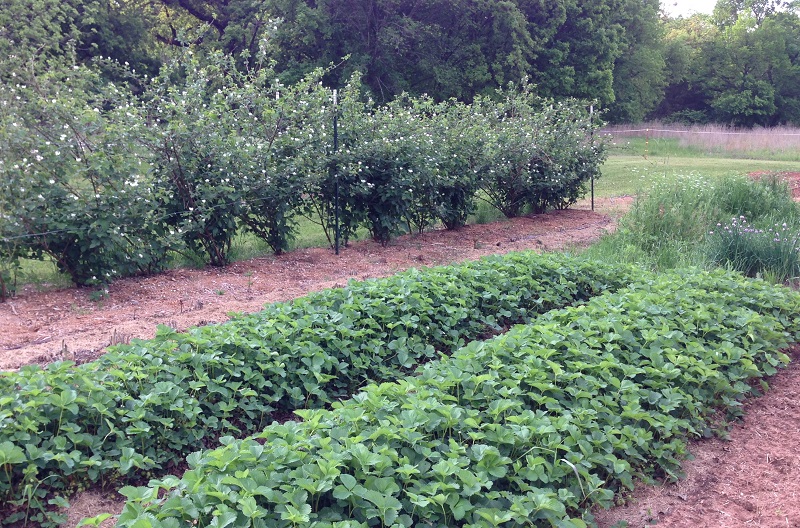
    The strawberries are prolific too. Probably too prolific since we have not thinned them since planting. We planted about 25 plants of two early bearing varieties and those plants have spread to completely cover the rows. I am surprised that our raised beds are still intact too. The crown of the bed is still 1-2 feet higher than the isle.


    Next year the strawberries will be thinned to 1 plant very 18 inches and fertilized. Early May strawberries
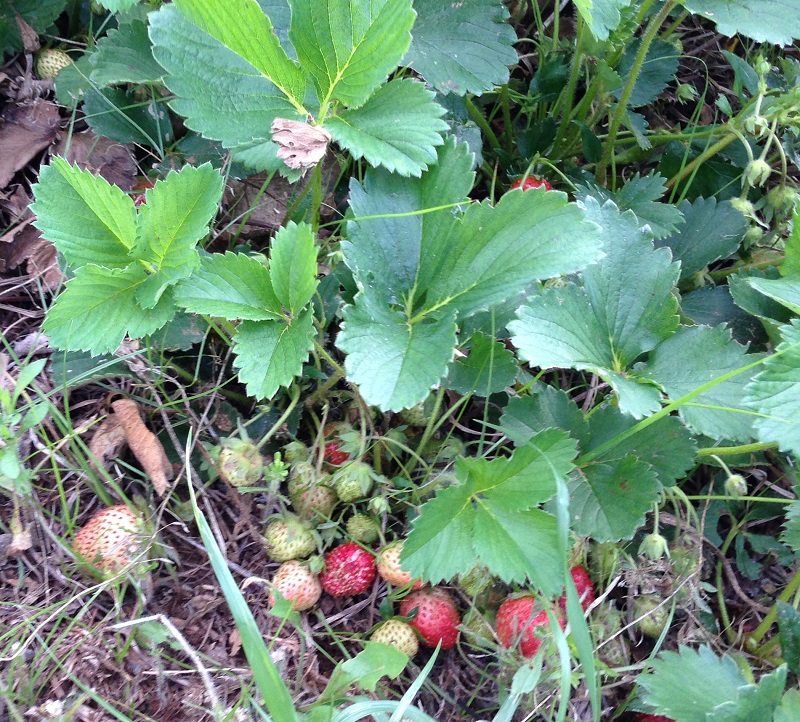
This year we will have many berries but not so big. Last year I made jam and will use larger jars. Lots of friends will get some.


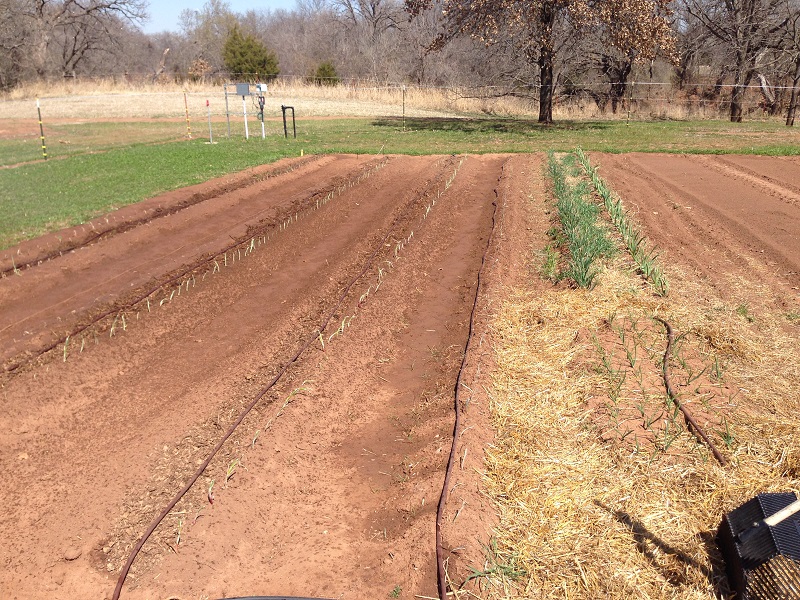
    Some chive can be seen in the top photo. They and some oregano have done very well and can be harvested too. We also have cilantro going to seed. It was planted in October. These seeds will be used to start another batch which will be ready when tomatoes and some peppers are ripe.

  • Alabama Red Okra

    Alabama Red Okra

    We have found a most excellent variety of heirloom okra. This variety is called Alabama Red. The pods are as big around as a 50 cent piece and still very tender. 4 or 5 pods makes a very generous serving. (more…)

  • Alliums are all planted

    Alliums are all planted

    Have you ever heard “When there is onion there is hope”? Who said that? But in my kitchen it is true. (more…)

  • Spring Planting begins

    Spring Planting begins

    The gardening season has begun. We are transplanting onion sets, leeks and planting potatoes. (more…)

  • Sideways Corn

    Sideways Corn

    I wonder if anything of value is accomplished without adversity? Have all the really easy jobs been taken? (more…)

  • Tomatoes are planted, let the gardening season begin!

    Tomatoes are planted, let the gardening season begin!

    Planting onions and potatoes is not as satisfying as planting tomatoes. This planting starts the gardening season for me. Maybe this is because my earlier gardens were small and very few varieties could be put in, so tomatoes, my favorite veggie to grow, was usually first.


    This year the first tomatoes in are Celebrity and Big Beef seedlings which were started early. Planting early is risky but these plants may well produce the first fruits of the season. Does everyone want to say: “I am already getting tomatoes from my garden!”? I need to shake off this boast and replace it with: “Man we are harvesting lots of tomatoes!” If is true then our food bank clients will be very happy.


    The seedlings are long and lanky, perfect for planting ‘on their side’. Long seedlings are laid in a trench, about 6 inches deep, so that the stem is mostly underground. The tip of the plant is gently bent to point up and out of the trench. Only a few leaves at the tip of the plant peek out above ground. In about two weeks the entire buried stem becomes covered with roots establishing a great root base for the plant. Half the roots will come from the root ball and half from the stem. We plant the stems to align with our drip irrigation lines so the roots are nearest water and cultivation near the row will not disturb major roots.


    The soil 1 foot below ground was very compact. It was difficult to drive a stake or to spade up. To encourage roots to grow down, the ground was broken with a 2 foot breaking plow. Each bed was plowed twice with this breaking plow. It is also called a sub-soiler. Tomato roots can be 5 feet long. To get this long they will need to grow down.


    It is risky to plant tomatoes in March in Oklahoma. Historical last frost is March 4th. But this is long history. A shorter view of ‘history’ is our heat wave. The last few summers have been ‘historically’ hot. Last year the last frost was March 7th. The heat has reduced the number of days tomatoes set fruit. So these early risky tomatoes hedge against another hot year. These tomatoes will have had a couple more weeks to bloom than later plantings (early April).


    The seasonal changes in Oklahoma make it a great place to live. If you like to see this sort of thing. In an Oklahoma spring, pears and plums bloom first, large flocks of Cedar Waxwings fly together whistling and take water at my pond. Daffodils and chickweed are in full bloom too. Wild geese pair up. But despite all these signs and having peas emerging by the hundreds, and 1/2 the garden already in the ground, planting the tomatoes marks the beginning of the garden season for me.


  • The Garden is Greening

    The Garden is Greening

    You have to look very closely. It is not obvious. The garden is greening! Plums and Pears are blooming!  Spring is in two days, snow is in the 4 day forecast, yet plants are emerging and greening up the garden. If you look closely above, the few herbs and garlic look strong. The onions are beginning to set roots. I expect the peas to come up any minute!


    Notice the drip lines are installed, and this 1/4 of the garden is planted. Adrian did the heavy lifting and dug 100 feet of 18 inch deep trench to plant asparagus. We filled 1/3 of the trenches with chicken litter compost and planted Mary Washington and Jersey Knight. The herbs provide instant green. Planted Rosemary, Oregano and Sage. The Chives from seed should go in tomorrow.


    The following show a 4 row section of cabbage onion, carrots and potatoes. It is quite a mix of veggies side by side. Crop rotation in the garden is going to be difficult. We have so many peppers, tomato, and potato: these make up over 1/4 of the garden. Each is in the same family and rows should not have any of these for 3-4 years. Will have to be clever with rotation.

    greening garden 2


    The grass we planted in October is doing well. It is the greenest success so far. The deer keep it mowed outside the fence and inside almost needs mowing now. The grass mix is annual rye, perennial rye and white clover. The clover sprouted last winter but is scant.


    Still planning on getting in some early tomatoes next week (if no snow or freeze in 7 day forecast).


  • Tomato fruit set temperature

    Tomato fruit set temperature

    The 2012 tomato season was poor for most people. I even heard about an elderly couple quitting gardening because of very low yield last year, saying, “It is just not worth all the work!” I think last year’s trouble was high temperatures.


    Tomatoes, America’s favorite garden veggie, were hit especially hard. They require certain temperature ranges to set fruit. Night time, when the fruit is set, must be between 62 – 70 degrees F. Normally night temps fall into this range frequently and tomato blooms set fruit. But last summer, in June, night temperatures rose above 70 F and stayed there until August 10th. Below you can see that 2009 had days throughout the summer.


    Green bars are days when night temps between 60-70 F.
    Green bars are days when night temps between 60-70 F.


    In 2009 the last spring freeze was about April 7. But in 2012 the last freeze was March 7. Last year I luckily planted tomatoes early and the plants set fruit in April. But if you planted late, you might only get a few fruit clusters to set before the summer heat began.

     
    I have to admit to “irrational exuberance” each spring. Spring fever is very strong. Today will be 80 F. I want to plant early.


    But based on the charts and a generally warming climate, a little risk may reward with a better crop of tomatoes. Or am I simply feverish?


    Either way, I have started enough tomato plants to risk a few. In my own little garden I have covered early plants with success. Covering them with plastic has protected them from light frost. Elm Tree Garden is bigger and would be more work to protect the plants.


    I think I will start 50 feet of tomatoes next week and hope for the best. I have planned this with some Celebrity and Big Beef seedlings which are being hardened off for that last several days. They are ready. I also planned on enough seedlings to replace these plants if frozen.


    Here the “Average” last frost date is April 1. But climate warming is happening and may have pushed the future last frost dates into March. I believe it has. Plant some of your tomatoes early in you are in Oklahoma and spread your risk.

  • Improving soil with chicken litter compost

    Improving soil with chicken litter compost

    If I have any secrets about gardening, it is chickens. Specifically how to use chicken litter compost to improve soil in a raised bed. In raised bed gardening you will use the same soil year after year so it is important to amend the soil. Once the beds are ready they are filled with the best soil available. Chicken compost can be added to increase nitrogen and organic material. The picture above is a yummy recipe for success.


    Fresh eggs, heirloom tomatoes and crookneck summer squash all come together in July. I look at composting like a cycle of life. The long days of summer are the best place to start. It takes time to take shape. Egg production is stimulated by long days. Hens are hungry and they love to eat from the garden. Their appetites produce lots-o-littler in the coup. All this poop must be cleaned up. I use a method that reduces the work and yields good quantities of litter ready for the compost pile.


    Chicken manure needs lots of carbon to compost well and reduce its ‘heat’ before adding to the garden. So I use wood shavings to cover the floor of the coup. After I make a layer of shavings, I add diatominous earth (DE) a powder of finely ground sea shells. DE is a powder that is abrasive to pests, helps dry the litter and really knocks down the stink. Once the DE finds its way into a raised bed it adds calcium to the soil. Once the chickens have made a mess of this I make another layer of wood shavings and DE. Three layers produce two or three large wheelbarrows of chicken litter for the compost pile.


    wire mesh compost piles
    Two new compost piles just starting in Elm Tree Garden.

    We use wire mesh hoops made from old fences to form the piles. The chicken litter is concentrated so we add it in with layers with grass clippings, ground up leaves and residue from weeding around our place. If we have any compost that is done, I like to add a small scattering of it to each layer of the pile to inoculate the pile. My hens help make about 5 piles a year. They are great producers! They also lay from 1 to 3 dozen eggs a day. I think that everyone that gets these eggs really enjoy them too.


    Turning a compost pile speeds the decomposition. If a pile is left untouched it still makes great compost but will take about a year to finish. A well turned pile will finish in half that time or less. If you turn your pile you will need several piles to work with. Probably the easiest way to turn a pile is to use a garden fork to shovel one pile into another pile. We lift our wire hoops off the pile and set it next to the pile. Then shovel the pile back into the hoop. Two turnings and four months in summer and the pile will be about done. Add water when you turn if it is dry. To really cook, a pile needs moisture.


    Except in winter our pile really heats up. Dig a hole down into the pile and place a thermometer. Our pile ‘cooks’ at about 140 degrees F. Grass clippings are really hot. This heat of decomposition is a good measure of how quick your pile is cooking down to the rich black earthy elixir that is compost. It will have a rich earthy smell and is fluffy (almost like potting soil).


    One good pile is enough for about 3 inches of compost in two of my 4′ x 16′ beds. I add crushed limestone to reduce acidity and help tomatoes absorb the calcium. This also prevents blossom rot on tomatoes, a calcium deficiency in the plant sometimes caused by the combination of rich chicken litter and highly acid soil.


    The soil in each of my beds is rich and loamy. It yields heavy production. I am very happy to give any of this back to my chickens. They only get the C grade fruit but they are delighted with all offerings when it is fresh from the garden. I keep them happy and they me.

  • Past Raised Bed Gardens

    Past Raised Bed Gardens

    Over the past 15 years I have moved several times. At each home I built gardens. While I hated to abandon a garden to a new owner, I have enjoyed improving the last design. With each new garden, improvements were made.

    My first, well designed garden is shown below. This first raised bed garden was at our home on Lake Eufaula. We had very little area that was full sun so I put the garden in the front yard.

    A simple two raised bed garden.
    A simple two bed raised bed garden.

    The raised beds are surrounded by pea gravel. This really helps with weed control and allows working in the garden even after a heavy rain (no muddy shoes). Each bed is built with 4″ x 4″ treated timbers and has popup sprinklers for irrigation which are controlled with a timer. A coldframe was used to start seeds and very early veggies like lettuce and cabbage. Notice the electrical outlet. It provided heat to the coldframe on very cold nights.

    The dimensions were chosen for maximum yield from the timbers and so that I could, while sitting on the edge of the bed, reach the other side of the bed for weeding. Each timber is secured to the one below with wood screws. This helps prevent warping of the timbers over time (treated wood is prone to warping).

    My second raised bed garden took this concept to a new level. The top picture shows this garden in season. I built this garden is two stages. The front part built the first year. Gazebos and the back portion with a small orchard was built later. The entire garden has a stone raised bed surround with a fence to keep out the deer.

    Fruit trees, gazebo, and almost 20 raised beds in my second garden.
    Fruit trees, folly, gazebo, and almost 20 raised beds in my second garden.

    This garden was very pretty. I began growing flowers and fruit and had nice places to sit and enjoy the outdoors. My favorite spot was under the wood portico which in summer was covered by a wisteria. In the blue-green ‘folly’ we would sit and have drinks with friends. We even added curtains in the folly for shade. The pea gravel infield had flagstone walkways adding a finished look. Risers were added to the sprinkler system to water pots and fill the fountain.

    One problem with raised beds built this way is that water can become trapped in the bottom of the bed. Many times while turning a bed a sour smell came from the soaked soil. Under each bed was a small pit was dug to make each bed a little deeper. But this pit retained water and would sour over time. I solved this problem in the back portion (built later) by placing french drains under each bed. The drains were connected and diverted under the stone wall and outside the garden. This solved the pooling water problem.

    I really hated leaving this garden.

    Finally, my last garden, much smaller and less elaborate, is made with large cedar timbers. It used timbers to mark the perimeter and to contain the pea gravel. French drains are under each bed. Each bed is irrigated with drip tubing. A riser in each bed has a valve to shut off water when fallow. The width of the timbers is easy to sit upon and the lap joint construction allows large lag bolts to secure each timber to the one below and help prevent warping.third garden 450

    The little brick area is used to wash vegetables. The drain is connected to the french drains and keeps standing water away from the area. There is a riser for watering pots. The entire garden is watered with a single automatic timer zone.

    The drip lines are the best way to water that I have found. They distribute the water evenly without waste and can be fitted with misters to help seeds germinate by keeping the soil surface damp. Misters can be shut off once seedlings have emerged and have developed sufficient roots.

    I just hope that Elm Tree Garden can be as productive as any of these past gardens.