Over the past 15 years I have moved several times. At each home I built gardens. While I hated to abandon a garden to a new owner, I have enjoyed improving the last design. With each new garden, improvements were made.
My first, well designed garden is shown below. This first raised bed garden was at our home on Lake Eufaula. We had very little area that was full sun so I put the garden in the front yard.

The raised beds are surrounded by pea gravel. This really helps with weed control and allows working in the garden even after a heavy rain (no muddy shoes). Each bed is built with 4″ x 4″ treated timbers and has popup sprinklers for irrigation which are controlled with a timer. A coldframe was used to start seeds and very early veggies like lettuce and cabbage. Notice the electrical outlet. It provided heat to the coldframe on very cold nights.
The dimensions were chosen for maximum yield from the timbers and so that I could, while sitting on the edge of the bed, reach the other side of the bed for weeding. Each timber is secured to the one below with wood screws. This helps prevent warping of the timbers over time (treated wood is prone to warping).
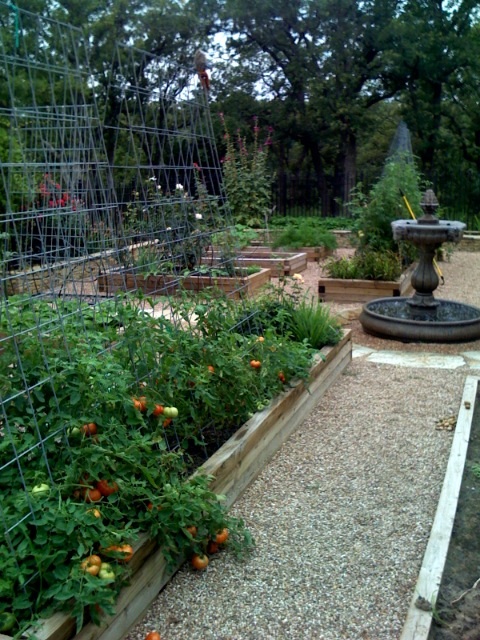
My second raised bed garden took this concept to a new level. The top picture shows this garden in season. I built this garden is two stages. The front part built the first year. Gazebos and the back portion with a small orchard was built later. The entire garden has a stone raised bed surround with a fence to keep out the deer.

This garden was very pretty. I began growing flowers and fruit and had nice places to sit and enjoy the outdoors. My favorite spot was under the wood portico which in summer was covered by a wisteria. In the blue-green ‘folly’ we would sit and have drinks with friends. We even added curtains in the folly for shade. The pea gravel infield had flagstone walkways adding a finished look. Risers were added to the sprinkler system to water pots and fill the fountain.
One problem with raised beds built this way is that water can become trapped in the bottom of the bed. Many times while turning a bed a sour smell came from the soaked soil. Under each bed was a small pit was dug to make each bed a little deeper. But this pit retained water and would sour over time. I solved this problem in the back portion (built later) by placing french drains under each bed. The drains were connected and diverted under the stone wall and outside the garden. This solved the pooling water problem.
I really hated leaving this garden.
Finally, my last garden, much smaller and less elaborate, is made with large cedar timbers. It used timbers to mark the perimeter and to contain the pea gravel. French drains are under each bed. Each bed is irrigated with drip tubing. A riser in each bed has a valve to shut off water when fallow. The width of the timbers is easy to sit upon and the lap joint construction allows large lag bolts to secure each timber to the one below and help prevent warping.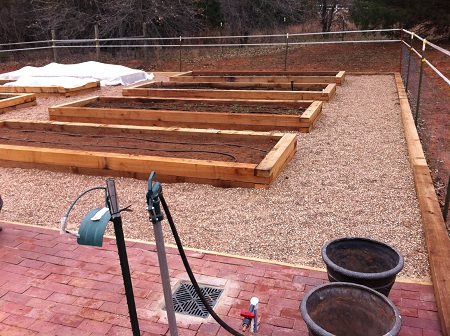
The little brick area is used to wash vegetables. The drain is connected to the french drains and keeps standing water away from the area. There is a riser for watering pots. The entire garden is watered with a single automatic timer zone.
The drip lines are the best way to water that I have found. They distribute the water evenly without waste and can be fitted with misters to help seeds germinate by keeping the soil surface damp. Misters can be shut off once seedlings have emerged and have developed sufficient roots.
I just hope that Elm Tree Garden can be as productive as any of these past gardens.
Leave a Reply
You must be logged in to post a comment.